Search This Blog

Monday, May 21, 2012

Turning Your Leftover Citrus Peels into Candy

A lot of people eat their citrus fruit and throw the rinds away. This is a shame. Here is a quick and easy way to turn your grapefruit, orange and lemon peels into a delicious candy.

What you'll need:

some type of citrus fruit, I used a grapefruit
sugar
water
parchment or wax paper

A quick note. It helps to use organic fruit that you know isn't coated in wax.

First I cut the grapefruit in half to eat. Then I took the peel, insides down, and cut it into strips with a pairing knife. I put the strips in a pot and covered them with cold water and put them on the stove to boil.


After it comes to a boil, drain the pot and start the boiling process all over, putting the rinds in the pot and covering with cold water. Do this about three to five times. The more you do this, the less bitter the candy will be.

Then drain the pot a final time. At this point I took the pairing knife and cut off the remnants of the pith and any leftover fruit. You can see here a quick before (right) and after (left).


In the same pot, I heated up one part water to two parts sugar. For this recipe I had 1 cup of water and 2 cups of sugar. Heat this mixture for about 15 minutes until it is syrupy. Then add the strips back and cook for about an hour.


Make sure during this hour that your syrup doesn't dissolve, burning your pot and the rinds.

After an hour, I used tongs and put the strips on parchment paper to dry. The fruit should be glistening and a little see through. Make sure the pieces aren't touching.

This drying process takes about 24 hours. I turned them once just to make sure the bottom sides dried.

I love these candies. They taste like healthy gummy bears or Swedish fish. They last for quite a while too, but I bet you'll eat them all before they go bad.


The Best Damn Broccoli Frittata Ever

There have only been a few times in my life that I've been shocked at how good something I've made is. Usually tasting the food as I go and just knowing all the little ingredients that might surprise others takes all the mystery out of my own food. This broccoli frittata left me purely giddy eating it. It was phenomenal.

A frittata is a lot like a quiche, but it doesn't ever have a crust and instead of putting ingredients into an egg mix, with a frittata you cook the vegetables in a pan and then dump the eggs over them.

We used to eat potato frittatas when I was a kid for dinner, but this past weekend I decided to make one for breakfast.

What you'll need:

4 eggs
1/4 cup milk
salt
garlic powder
onion powder
olive oil
butter
yellow onion, chopped
fresh broccoli florets
cheddar cheese, shredded
1/4 cup feta cheese

I started by chopping the onions and adding them to a nonstick pan with melted butter and olive oil. Then I added the broccoli and sauteed both until they were soft.

In a bowl, I whisked four eggs with milk. I added salt, garlic powder and onion powder to taste. Then I added in two kinds of cheese, cheddar and feta.


I poured the mix over the cooked broccoli and onions and kept cooking the mixture on medium heat.

Now normally you can attempt to flip a frittata to cook the other side on the surface of the pan. If you've made a small one, this is doable, but for this bigger one I just let it cook almost all the way through. I lowered the heat after about 7 minutes so the bottom side didn't burn and I covered the pan so the top would begin cooking.


When the egg on the top was still soft but cooked through, like with slightly wet scrambled eggs, I placed an upside-down plate over the pan and quickly flipped it over.


The delicious brown crust on what was the bottom side worked so well with the gooey, cheesy, eggy delight that was the other side of the frittata. Just look at it.


This meal might be one of the best breakfasts I've ever had. It tasted like broccoli and cheddar soup, but it had that thing that makes eggs so phenomenal. Fluffy but oozing, creamy but cooked through. It was heaven. I dare you to not smile the whole way through breakfast.

What the F*ck is That? Starfruit Edition

It's time for another edition of What the F*ck is That? A little feature in my blog that explores eating a new fruit or veggie that I've never had. This time, I attempted the starfruit.


Also called carambola, this fruit grows in the U.S. in Hawaii and Florida and is also popular in Southeast Asia and a lot of the countries bordering the Indian Ocean. It's pretty obvious why it's called a starfruit.


A quick warning about starfruit before we move on. It is reported to have serious negative effects if you have kidney problems.

First I had to figure out how to cut the thing. I did a little research and repeated what I read.

I took some kitchen sheers and cut off the five ridges of the star fruit. Then you look for the end of the starfruit that was once connected to the tree and cut it off. It is the narrower side.

There are no seeds or anything, so from here on out it's just slicing the fruit so it looks like cute little stars.

The starfruit is one of the most fibrous fruits I've ever had. I looked it up and it only has 30 calories. It is a little tiny bit tangy with some perfumey notes, but for the most part this fruit is texture over flavor. It kind of reminded me of eating a very, very, very under-ripe grape. That kind of mouthfeel. I apparently ate this one when it wasn't quite ripe yet. I'll have to try it again when it's more soft.

Probably the best thing about this fruit though is just how fun it would make a fruit salad look.


Yellow Squash Becomes Spaghetti?

One day I was chopping up my yellow squash to have as a side with some mussels in spicy marinara and I thought, I wonder if this kind of squash would work as spaghetti.


There is of course a spaghetti squash that people use this way, but I thought I'd give it a go with regular yellow squash.

Like all good Italian food, this is the most simple recipe. The list of what you'll need is almost not necessary:

yellow squash
salt
Romano cheese, to taste

First I cut the squash into strips so it would look like spaghetti.


I put a pot of water on to boil and salted it like I would with pasta water.


I cooked the strips until they were tender. Then I ran them under cold water to stop the cooking process so they wouldn't get so mushy.

I topped it with marinara and grated Romano and tested it out.

Turns out it's really hard to stop the squash from getting a little too mushy, even with the cold water rinse. Perhaps I'll try this again with a different cooking technique. The flavor was great though. This is one of the drawing board. 

Monday, May 14, 2012

Sweet Potato Pie

I got an absolutely massive sweet potato the other week, so what could I do but make a big pie out of it?


I've never attempted this Southern treat before, but I looked at a few recipes and concocted my own blend of all of them, and it turned out perfectly. I wouldn't change a teaspoon.

What you'll need for the filling:

2 cups sweet potato, mashed (can you believe that sweet potato in the picture gave me 3 cups?!?)
2 eggs
1/2 cup milk
1/2 cup sugar
1/4 cup brown sugar
3/4 cup margarine or butter, melted
1/2 tsp. vanilla extract
1 tsp. orange zest
1 tsp. cinnamon
1 tsp. nutmeg

I also used an immersion blender, so something that can puree potatoes is a must.

Preheat the oven to 425 degrees.

I used the same crust recipe I did for the apple and pear tart.

I microwaved the sweet potato. My microwave has a potato setting that worked perfectly to make it soft. It was okay that it wasn't perfectly cooked to the degree I'd put butter on it and eat it, but you have to be able to mash it with a fork.

Then I took the (very hot!) potato out and took the peel off. I scooped two cups of the sweet potato into a bowl and mashed it around a bit with a fork.


Then I simply added the rest of the ingredients. Make sure the butter or margarine is melted or it won't blend well. Then when it was all incorporated in the bowl, I used an immersion blender to make the sweet potato smooth.


I poured the mix into the crust and put it in the oven for 15 minutes.


Then I turned the oven down to 350 and cooked it for another 35 minutes. It's done when a toothpick comes out cleanly from the center.

I brought it to a get-together at my boss' house, and he called it one of the best pies he's ever eaten. I have to agree. I like this pie loads more than pumpkin pie, though to be fair I've never had it not from a can. It was much more complex, and it was the perfect level of sweet. It still tasted like dessert, but it wasn't sickeningly sweet. A little whipped cream on top would put this pie over the top.


Tuesday, May 8, 2012

The Verdict on That Yeast

I tested out the yeast I used in my last pizza post to see how it would be after slow-rising in the fridge for 24 hours.

I took the dough out about a half hour before I needed to use it so it could come back to room temperature.

The dough was definitely harder to work with, and it shrunk back a bit with each tug I gave it (not a good sign).

I decided to do a more traditional pizza today, just tomato sauce, mozzarella and some basil leaves at the end.

The pizza itself looked fantastic.


The crust from the day prior had more crunch to it. This was more bready, but it had a deliciously gooey factor to it. My ideal pizza crust is very crispy on the bottom but gooey just under where the cheese is. I peeled off some cheese so you could see what I'm talking about.


I suspect if I had a legitimate pizza oven, or actually went out and got some unglazed tiles to bake on, that this might be damn close to my perfect pizza. 

Monday, May 7, 2012

What the F*ck is That? Mandarin Gold Nugget

I thought I'd start a new section of my blog, eloquently titled, "What the F*ck is That?"

In this section, I'll be eating a fruit or vegetable I see in the store that I have never seen or eaten before at all. This week at Safeway, I was drawn to this orange that looks like a little squash because of its ridges and dimples, the Mandarin Gold Nugget.


Its PLU is #4055 for those on the lookout, the gold nugget was made by the University of California Riverside and is seedless.

If you're a nerd, like me, and want to know all about the fruit, you can read about it here.

This is the easiest to peel orange of all time! It probably took me 10 seconds to do the whole thing.

The flavor is bright in the beginning, the same as a navel orange, but then it doesn't have that acidic, hyper-sweet finish. If you don't eat orange because of acid reflux or blood sugar issues, I think this fruit is definitely worth it! The pith was a little rough, so if you prefer smoother cased citrus, like clementines, you likely won't enjoy the texture of this orange. This also isn't the juiciest orange I've ever had, but it's a good mix of moist but not messy.

Essentially, this might be the perfect eat-at-your-desk orange. Not messy, easy to peel and still tasty. 

Shrimp and Arugula Pizza

This blog is a bit of a vegetable cop out. If I were on "Chopped," I'd be kicked off for not transforming the ingredient. But my full, happy stomach does not care.

In my last vegetable shipment, I got a bunch of loose arugula, roots still on. I thought for a while about making an arugula pesto, but then I watched an episode of "Good Eats," by Alton Brown, and I caught the pizza making bug.

I actually taught a pizza making class a few years back. Am I a perfect pizza maker? No. I think nearly everyone who becomes obsessed with making the perfect pizza crust is in for a life-long struggle to compete with some unattainable pizza they once had. For me, it was when my family visited New York one summer, sometime before September 11. I will never know the name of this pizza place, and I suspect it no longer exists, because it was very close to where Ground Zero would eventually be.

My favorite pizza that I can recall is Maruca's in Seaside, New Jersey. My grandparents deemed this pizza their favorite two generations ago, and me and my family still agree. I'm a family-oriented person, and I like seeing thoughts and ideas pass on from generation to generation. I recently told my dad that I preferred Bosc pears, and he said his grandfather, who he called Papa, also liked them best. I'd like to think that all things in life are a little bit like that: That we're all just carrying on small pieces of everyone who came before us without knowing it.

Anyhow, this recipe is just a small step forward in my endless quest for pizza perfection. What you'll need:

Crust:
2 cups bread flour
1 packet of Fleischmann's pizza dough yeast (I found it at a Harris Teeter)
1 tablespoon kosher salt
1 cup warm to hot water

Sauce:
2 tablespoons olive oil
2 tablespoons flour
milk
onion powder
garlic powder
dried parsley

Toppings:
shrimp
arugula, washed and stemmed
mozzarella cheese
feta cheese
Romano cheese
oregano
finishing olive oil

Preheat your oven to 475 degrees.

I made the sauce first so it would be ready when the crust was. I put the olive oil and flour (I used regular all-purpose) in a pan on medium heat and whisked them together until they made a roux.


Then I turned the heat up a touch and added milk. As you keep whisking, the milk will thicken and make an alfredo-like sauce, called a bechamel. I'm not sure it's a true bechamel, since it typically is made with butter instead of oil, but I think that sounds more Italian than French anyway. Plus, it's healthier for you.


I added a good amount of garlic, onion and parsley, but this is all really to taste. Measure it out how you want. Then I turned the heat off and went onto make my dough.


Alton Brown had me obsessed with trying bread flour instead of all-purpose for the crust, and that man was right. If you want a more Neapolitan style pizza, you can buy 00 flour from Whole Foods. But if you like a more New York style pizza, which I do, this is the flour. He recommended even getting bread flour for a bread machine, if you can find it.

He also sent me in search of a different yeast. Sadly, I didn't find what I was looking for, but I did find this Fleischmann's packet of pizza yeast that lets you cook instantly.


I assure you, this is CRAZY. In my mind, pizza takes 24 hours. I typically make a one-hour pizza dough, because when I want pizza, I want it now! But I was pretty happy with how this packet turned out, so when I'm in a pinch, I think I'll use this as a backup option.

Another crazy thing about this yeast: You do not need to temper it with warm water before using it. Typically, you need to mix warm water and yeast in a measuring cup for about five minutes, until foamy, to activate it. But this stuff you just dump right into a mix.

So I put all the crust ingredients in a bowl and mixed them for about three minutes with a fork. Then I took my rings off and switched to my hands. I probably kneaded for another 10 minutes at this point. Think of kneading like endlessly folding over the sleeves of a shirt. Just take half of the dough and fold it on top of itself in alternating directions.


This crust recipe makes two pizzas, so I cut the dough in half and put the other half in a plastic bag sprayed with olive oil. This can keep for about 5 days. I'm interested to try cooking with this other half of the dough to see if the yeast is better yet after being able to slow rise in the fridge for a day.

Then I gently punched the dough out into a small circle. If you cannot toss a pizza, simply pass it back and forth from hand to hand and then, with the dough on a floured countertop, gently tug out the edges of the dough evenly on all sides. You want to ensure a thin middle crust but a thicker outer edge so it forms a crust.


See-through dough, like I ended up with, is fine. Don't worry about it. Just try to make it fairly even.

Once that was done, I sprayed my favorite pizza pan (I hate my pizza stone) and put the dough on top. It wasn't a perfect circle, but I made it pretty close, so it worked out.

Then I went back to the sauce, turning the heat back on for a second just to loosen it back up. Then I spooned the mix and spread it around the crust.

Then I added a small amount of feta cheese, followed by a larger amount of mozzarella to fill out the crust. I had some leftover shrimp in my fridge I had to use, so I chopped it up and put it on top.


I like putting some nice, finishing olive oil in a spiral on top of my pizzas. It doesn't make them greasy. Just imparts a ton of flavor.

Then I put the pizza in a 475 degree oven for 10 minutes. Yes, my oversensitive smoke detectors went off. I suppose that's what happens when you have two in a 600-square-foot apartment...

While in the oven, I washed and stemmed the arugula, patting it dry with paper towels so it wouldn't be soggy.

Ten minutes was perfect. I took it out of the oven and let it sit for about five minutes. I put the arugula all over the top and shredded the Romano on top. I then sprinkled it with some oregano.


This pizza was amazing. I was beyond happy with the bread crust, and I couldn't detect any weird texture, smell or taste from the super-instant yeast. I will try this recipe again! And again, and again, and again. 

Tuesday, April 24, 2012

Baked Sweet Potato Fries

In my latest grocery shipment, I got about five or six sweet potatoes — one of my absolute all-time favorite vegetables. They're simply one of the most naturally, but not overpoweringly, sweet and healthy things you can eat.

One of the things I don't like about them, and all potatoes, though is that it takes forever to cook them. To cut down on the cooking time while also attempting to still make a somewhat healthy side dish, I decided to try baked sweet potato fries.

Since I baked them, they did not end up having the crunch of a deep-fried fry, but it was still a great way to eat a sweet potato in under 30 minutes from prep to table.

What you'll need to make one serving:

1 medium sweet potato
1/4 cup canola oil
1 tsp. kosher salt
1 tsp. cayenne pepper
1 tbsp. brown sugar

Preheat your oven to 450 degrees.


Skin the sweet potato and cut into long, thin strips. I accomplished this by halving the sweet potato lengthwise. Then I halved each half, but with cuts parallel to the first. So I had four equally thick slices of potato. Then I took those flat pieces and cut them uniformly.


It's sad to say, but at this point if you have any small and strangely shaped pieces, they will most definitely burn in the oven. They are worth throwing out or perhaps cooking for half the time with a VERY keen eye on them. I became extremely adept at running over to my very oversensitive smoke detectors during making these potatoes.

Then I coated a cookie sheet with canola oil. Feel free to put parchment paper on the baking sheet so it's easier to clean. I added the strip of sweet potato and sprinkled the salt, cayenne and sugar evenly over the top. Then I mixed the whole batch around with my hands, making the oil and spice mix more even.

The cayenne does, of course, add some kick to the potatoes, but it was really well balanced with the sugar. Unless you're extremely sensitive to heat, I think you'll like this addition to this recipe.

My plan was to cook the potatoes for 15 minutes, turn them over and cook them again for 15 more. Thanks to my lovely smoke detector, I managed 15 minutes on one side and only 10 on the other. But the results were perfectly fine, a little darker where the slices were thinner, but not really burnt. I tend to like my food really crispy and only think toast is burnt when it's black. If you don't like that kind of texture to your food, I'd recommend cutting the ends of the fries so they're blunt.

I put the fries on a paper towel for a little bit before serving so the oil wouldn't get soaked up by the fries.


Though I longed a little for the crispier texture you get from deep-fried restaurant sweet potato fries, they still were delicious. I'm mostly overjoyed to have a new way of cooking sweet potatoes that takes 25-30 minutes.


Sweet potato fries with my portobello burger recipe from last month. 

Thursday, April 19, 2012

Brussels Sprouts in Apricot Jam

My dad is a great cook. Between both of my parents, it's a miracle I don't weigh 300 pounds, because between the two of them, I'm pretty sure they can cook or bake anything. My mother does 100 percent of the baking duties, and growing up I'd eat a lot of very hearty, very American meals, usually a meat, a starch and a few vegetables. My father is about half Italian, and inherited that style of cooking, which he's also passed onto my mother. 

In a change of what I consider their typical kitchen roles, my dad set about to make pork roast, sweet potatoes, cranberry and apple stuffing, and some roasted Brussels sprouts serving as our green for dinner. 

While a lot of people don't like the bitterness of Brussels sprouts, I love them. They were even one of my favorite vegetables as a kid, and somehow I forgot about them for about 10 years until one day my roommate was cooking some. I tried one again and thought, "What have I been doing denying myself these delicious greens for so long?"

To balance some of that bitter, my dad decided to experiment and add some apricot fruit spread to the Brussels sprouts. Here is the ingredients list:

butter
Brussels sprouts
apricot jam


Very short, right? First my dad washed and halved the Brussels sprouts. 


He then added I'd estimate about three tablespoons of butter to a pan and turned the heat on. 


Once the butter was melted, he added the Brussels sprouts and cooked them until they were browned a bit on the outside and soft in the middle.


In a separate sauce pan, he put about a cup of apricot jam and heated it so it was warm and more fluid.


Here is where I think both he and I would recommend you diverge from how he actually cooked them. My dad added the heated apricot to the Brussels sprouts. It turns out when you do that, the Brussels sprouts absorb a lot of the jam and get a little soggy.

If we were to do it over, I think we'd plate the Brussels sprouts and drizzle the apricot over it, not using the entire mixture. Also, if one of my sisters was not a vegetarian, I'd like to see what this would taste like with bacon it. Bacon with Brussels sprouts is a very easy way to get anyone to find them more palatable. Perhaps I'd also add some ginger to the apricot jam.


Anyhow, the dish turned out having good flavor but was a touch soggy. This is a recipe for the drawing boards, but the entire meal turned out deliciously. My dad's pork was fantastic, as was the sweet potato. My mother, who has a bigger sweet tooth than I do, really liked the cranberry apple stuffing. I liked it, but in a smaller portion. 


Perhaps one day I'll expound on this recipe and give it another go! I'll see my family again in 10 weeks, so we'll see if I've got it nailed by then. 

Orange Honey Bread

I spent the weekend in Florida with my mom, dad and two sisters, and thought it'd be fun to have a guest blog or two, since basically everybody in my family cooks. 

My sister is very into healthy eating, and especially healthy baking. I can't remember the exact number she's lost, but I think it's around 20 pounds through tracking what she eats and balancing her intake with exercise. The point is, she still eats what she wants, just not as much of it, so you can totally bake your heart out as long as you're smart about it.

Here's what you'll need to make Michelle's orange honey bread:

2 tbsp. Smart Balance Buttery Spread (or substitute butter)
1 cup honey
2 egg whites from large eggs
2 tsp. orange zest
2 cups white flour
1/2 cup whole wheat flour (you can add another 1/2 cup of white flour if you don't have whole wheat)
2 1/2 tsp. baking powder
1/2 tsp. baking soda
1/4 tsp. salt
6 fluid oz. fresh squeezed orange juice (you can get both this and the orange zest from about 2 oranges)
1/8 tsp. vanilla extract
1/16 tsp. lemon extract


Preheat the oven to 325 and grease and flour a bread tin. The one we used was 9 inches. 

Cut your oranges in half and juice, making sure if it has seeds they do not get in the fluid. It's okay if the pulp does. 


Then take what's left of the orange and grate the peel to get 2 tsps. of zest. 

Add the butter to a mixing bowl, add honey and blend until smooth. 

In a separate bowl, beat the egg whites until foamy but not stiff, about 2 minutes. This will make your bread lighter and fluffier. Add the orange zest to the egg whites and blend. Add the orange juice, vanilla extract and lemon extract to the egg white mix.

In a separate bowl, sift all dry ingredients together: white flour, whole wheat flour, baking powder, baking soda and salt. 

Alternating as you go, mix the dry ingredients bowl and the egg mixture into the honey and butter mix until all ingredients are fully blended. 


You may have to scrape the underside of the bowl to make sure all flour is blended in. 

Blended and tasting good!

Then place mixture into the bread tin. This bread bakes at a pretty low temperature, 325, because the honey would otherwise burn, so be careful if your oven tends to run high. Michelle baked the cake for 60 minutes, when a toothpick came out cleanly. 

The result was a very moist, summery cake. And for a person, like myself, who prefers the flavor of white flour, the 1/2 cup whole wheat flour taste was barely there, completely overtaken by the blend of orange and honey. I really liked using this bread as a breakfast bread, toasting it and putting melted butter on top. 


If you cut the bread into 12 slices, it's 204 calories per slice, with only 1.8 grams of fat, 25 grams of sugar, and 8 mg of Vitamin C. 

Thursday, March 29, 2012

Carrot, Date, Currant and Coconut Bread

It's been really hard for me to determine what to do with the carrots I have. I didn't want to just make some candied carrots as a side.

It hit me that I don't recall ever making carrot cake, though I love it. Instead of going for a full-on cake though, I thought I'd try a loaf. I added some Medjool dates that I had delivered to my house, along with some currants and coconut flakes. 

What you'll need:
1 cup of shredded carrots (about 1/3 pound, or 3 large carrots)
1/3 cup Medjool dates, pitted and chopped
1/3 cup Zante currants
1/3 cup shredded coconut
warm water
2 cups flour
3/4 cup sugar
3 eggs
1 tablespoon baking powder
1 1/2 teaspoons cinnamon
3 tablespoons canola oil
canola spray

For gluten-free people, I found a similar recipe on Whole Foods' website for carrot and date muffins that uses a blend of almond and either amaranth or millet flour. I'd imagine that would work with this recipe too, 1/2 a cup of almond flour and 1/2 a cup of either amaranth or millet. 

Preheat your oven to 350 degrees. 

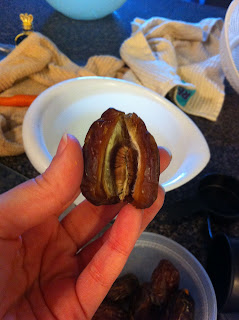
First, pit and chop the dates. a cut down the middle with a knife should let you peel the date back from the pit. 


Add the chopped dates to a bowl with the currants. Cover them with warm water to help reconstitute the dried fruit. 

Then shred up your carrots. I did it using a plain old grater.


Crack your eggs in a bowl. Adding eggs first will help if you accidentally get a piece of shell in there. Then add the canola oil and carrots. 


In a larger bowl, add the flour, sugar, baking powder and cinnamon. Blend until all ingredients are thoroughly mixed. Then add the coconut and blend again. 

Then add the ingredients from the carrot bowl into the dry ingredient bowl. Drain the dates and currants and add them to the bowl as well. Blend all the ingredients until you can no longer see any white flour and everything is evenly incorporated.

Then I sprayed a 9-inch bread pan with canola oil and poured the very dense mixture into it. I baked it for and hour, when I could pull out a toothpick cleanly.


Turns out, the dates are actually the stars of this bread, not the carrots. They're so sweet and add a lot of texture to the dish too. It's pretty dense, like it was as a batter. Perhaps if I wanted to lighten it up next time I'd add more oil or some apple sauce.

But the great thing about this bread is it is the perfect amount of sweet to be either a breakfast toast with some butter on it or a dessert by icing it with cream cheese frosting.